Art Tips For Procreate App: Get A Detailed Insight

Create expressive sketches by painting your art with the Procreate App, exclusively available for iPad users. It offers a high-definition canvas, having a 64-bit color feature with a canvas of 16k by 8k and a 64-bit painting engine. You can customize your color palettes on this app, which is power packed with intuitive features and unique creative tools. Time to dive into some art tips for Procreate App!
What is Procreate?
Procreate is a complete art studio to be taken anywhere. Moreover, it’s an award-winning app, sufficing the creative experience of digital artists. There are more than 200 handcrafted brushes that include a library of brushes like charcoal, pencil, inks, artistic brushes, etc. Users can also download thousands of brushes to suit their imagining styles. You can customize your color palette and brushes with some settings in the Procreate App.
Important Art Tips to Follow to Create Designs Like A Pro
Many Pros have stated how they are mesmerized by using the Procreate App and its advantages for the client’s project. An important art tip is to use the correct brushes and palette to bring out the amazingness in your digital illustration art.
Let us tell you more about the Procreate design tips that will make your work smarter and not harder.
-
Setting Up The Right Canvas
First thing every artist need is a canvas that will give shape to their ideas and thoughts. Now, a canvas can be an A3 sheet or a digital app like Procreate (for Apple device users). The Procreate App is loaded with eye-catchy canvas presets, but there is always room to customize it.
You can set up a custom canvas in the following way:
- Open Gallery
- Tap the “+” icon in the upper right-hand corner
- Click on the rectangle icon on the top right of the screen
- Now, set the custom dimensions and DPI for your canvas
The most recommended settings for the DPI are high-quality prints should be 300 DPI for digital art, 150 DPI, and for web-only images, it is 72 DPI.
In Procreate App, you have to set the canvas dimensions once and can use it accordingly. You can select the preset template and start working on it.
-
Creating Customized Color Palettes
With digital art flourishing daily, digital artists are looking for fun ways to fill in amazing and fun-filled colors in their designs. This iPad drawing app provides a provision for artists to create a custom palette of colors. There is a handcrafted color palette in Procreate App. But that doesn’t stop the users from creating their customized color range. You can do it in the following ways:
- Select an image whose colors you want to import into the Procreate App
- After selecting the stated image, open the canvas in the app, and insert the reference image there.
- Open the Color Panel and then the Color Panel Submenu, where you can show the palette.
- Press + to create a customized color palette.
- Select colors from the reference image and drop them on the panel, as you use an eyedropper tool to drop the colors.
This way, your color palette of eye-catchy and mesmerizing colors is ready. This color palette will get saved under the collection and appear under History. You can even remove the colors or share them by sliding your finger from right to left over the palette.

-
Click On Settings to Create Custom Brushes
Procreate App has almost 200 handcrafted brushes with settings like pencil, ink, artistic brushes, and much more. They help to bring texture, variation, and noise to the art. Another great art tips for Procreate app: did you know you can customize your digital brushes?
Yes, you can create your brushes from scratch, as the brush options are nearly endless in advanced settings. Customizing your brushes provides versatile options to make your brush appear differently. One Procreate tip for you is that when using the stylus to draw something with the help of brushes, make sure to use the PenMat. It will give you a more natural feeling and help in removing those fingerprints or bubbles from your canvas.

Let us now check out the steps for creating custom brushes:
- Tap on Brush Icon, and create a new brush by selecting the + sign on the top-right corner of the Brush Library.
- The Brush source section will help you change the brushes' appearance, as you can use the grain source to check the appearance.
- Test the brush settings by clicking on the Advanced Brush settings. Alteration can be done later on.
- You can now test your brush on the canvas by saving it.

-
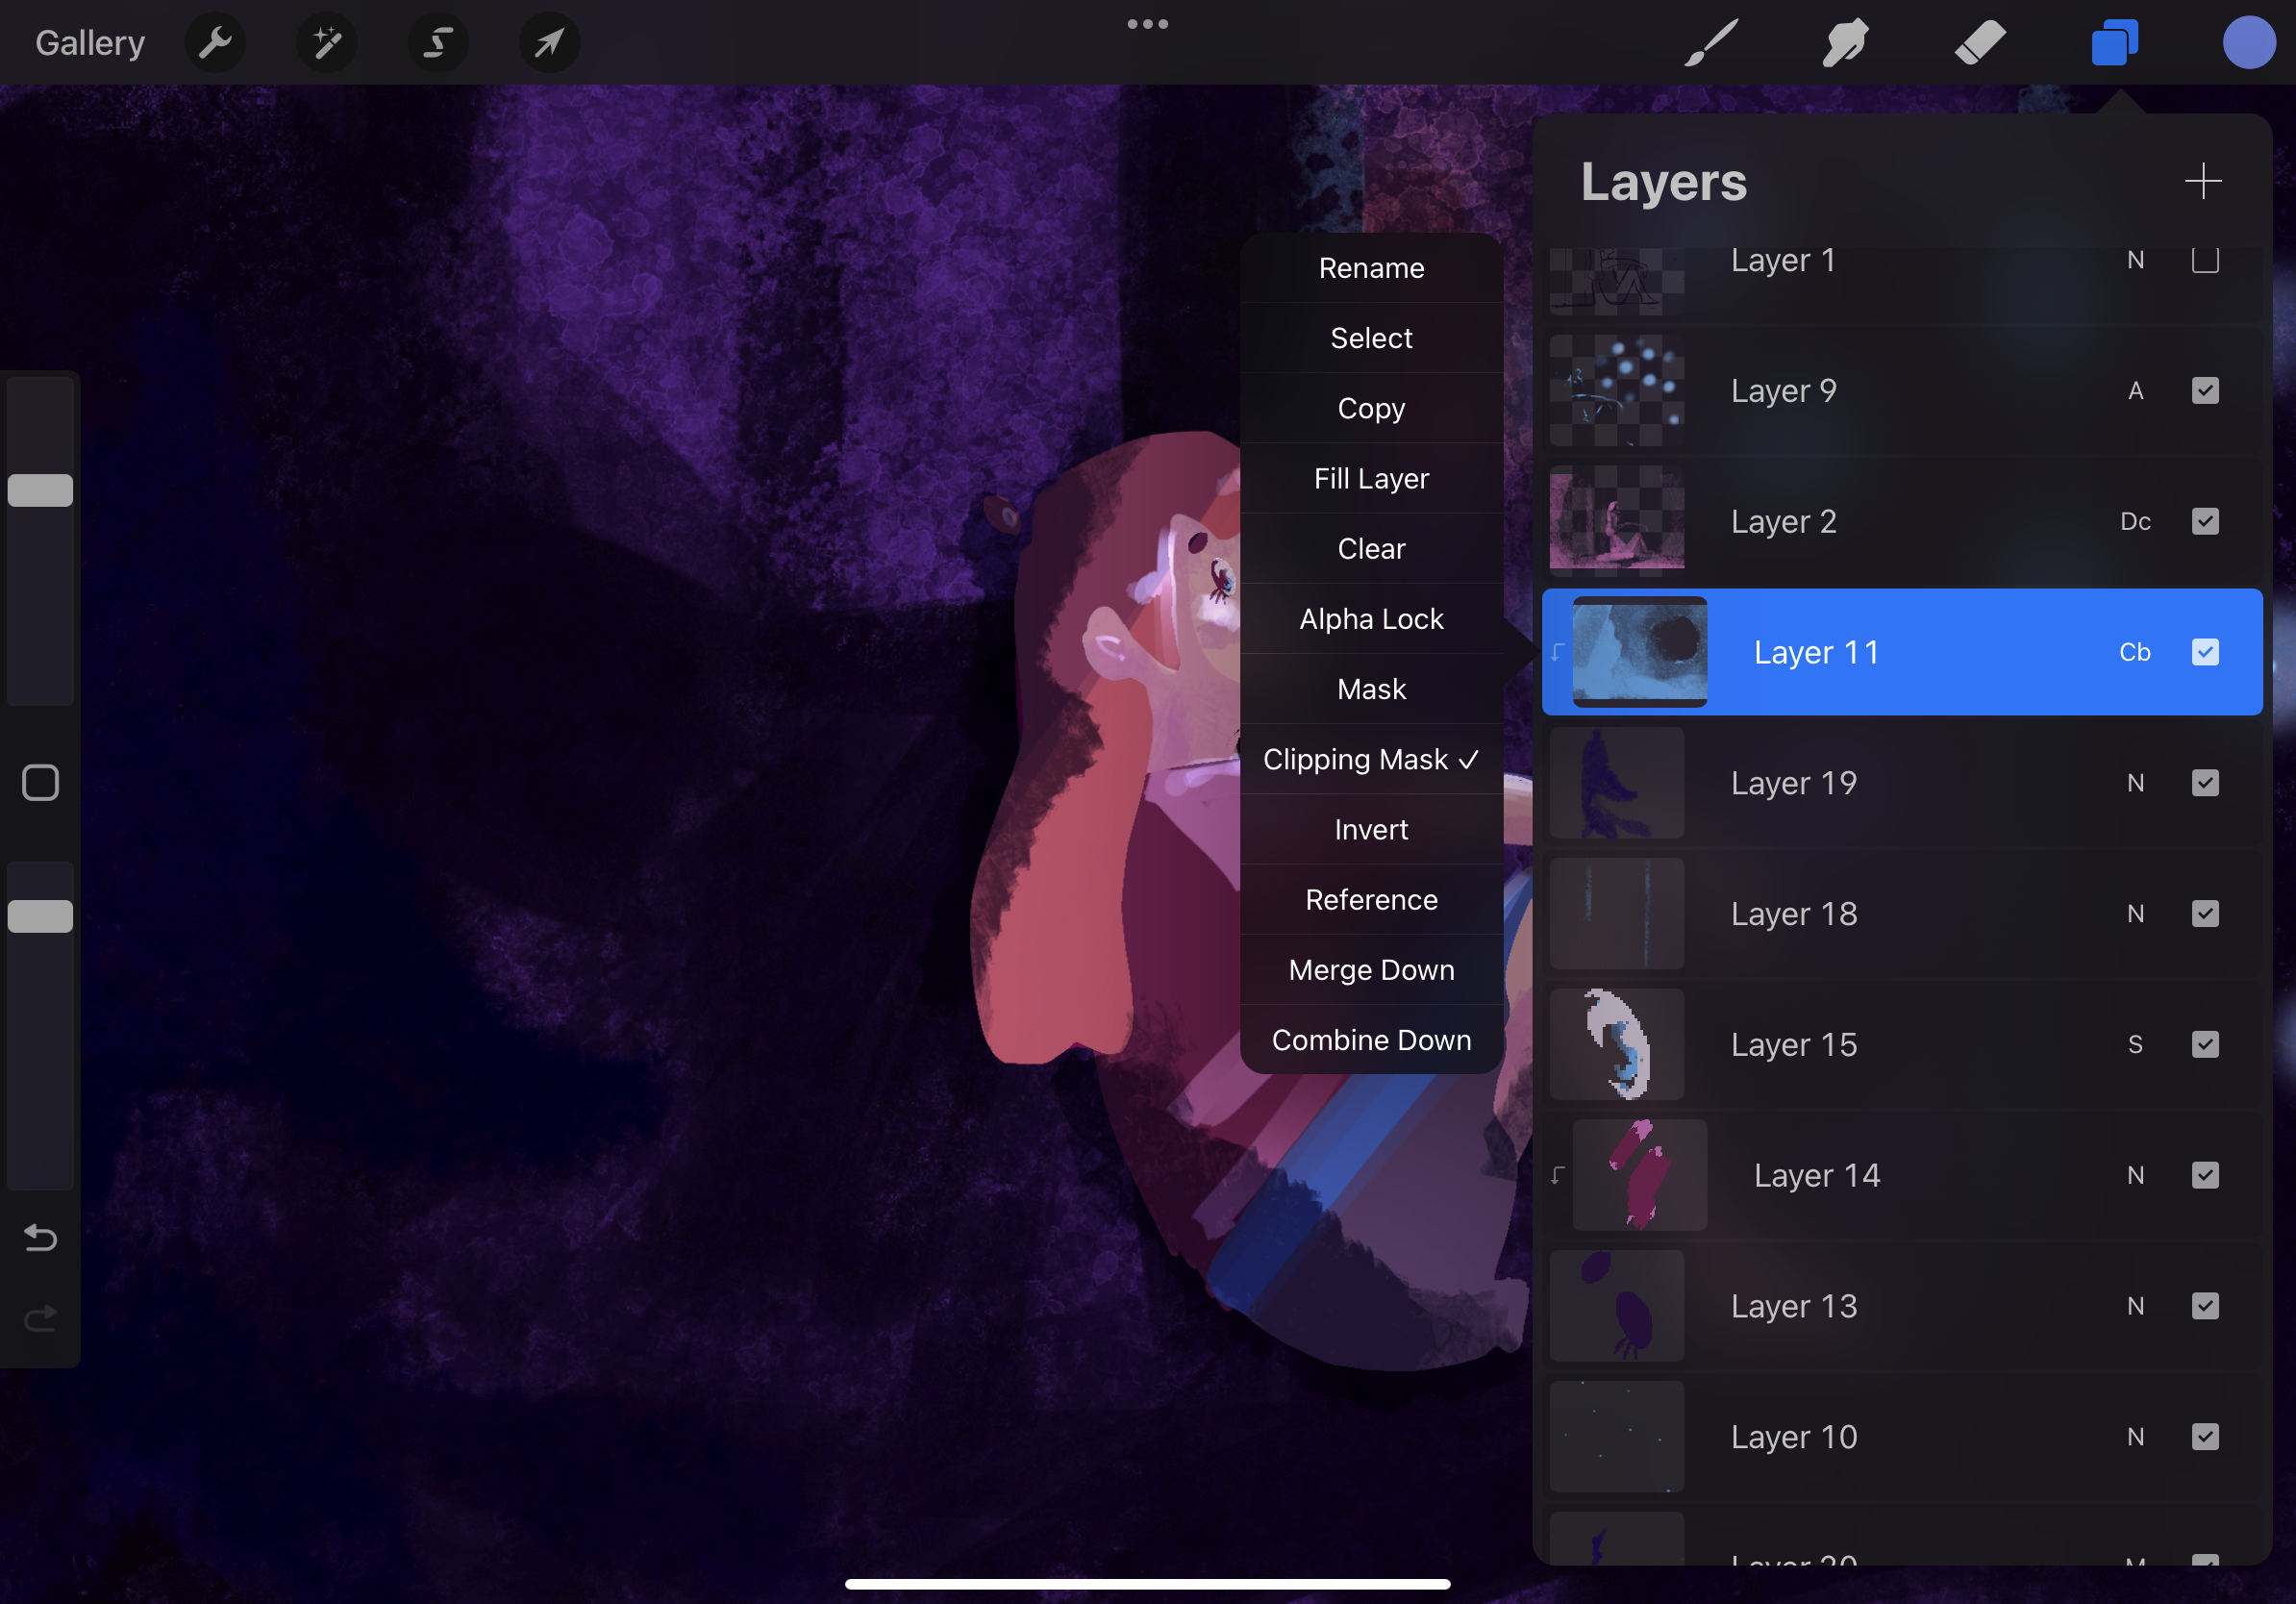
Use Clipping Mask
Digital artists mainly use clipping masks to make the drawings look effective and unique. It helps in making changes in the designs while maintaining the flexibility of art. You can experiment with the blend modes in the app, recreate the colors and shadows, and create eye-catchy things in a non-destructive way.
Any layer in the artwork can become a clipping mask. But you must position it above the layer that needs editing.
You can select the Clipping Mask option in the Procreate App, which will be shown through a small arrow, a sign appearing on the left side of the layer. This feature never lets the artist compromise on their original artwork. If you want to add additional details or colors, use the Clipping Mask tool. Clipping Mask works well with the blending tool as it makes the digital art enhanced and mesmerizing.
Wrapping Up
The Procreate app is becoming the best friend of every digital artist and illustrator. The app has versatile capabilities and options to add an oomph factor to your designs. Adding custom templates, colors, brushes, etc., art tips for Procreate app that make a wonderful source to impress your clients. Moreover, this app follows a league of its own by providing users with blending, mixing, adding layers, quick shaping, smudging, and many other options.


Wow, that’s what I was looking for, what a material!
existing here at this weblog, thanks admin of this website.
It’s really a great and helpful piece of info. I’m glad that you shared this useful info with us.
Please keep us up to date like this. Thanks for sharing.
Leave a comment