How to Turn Off Pen Pressure in Clip Studio Paint

Clip Studio Paint is a powerful and versatile digital art software used by both amateur and professional artists. It offers a wide range of tools and features that can be customized to suit your specific needs. One such feature is pen pressure, which can be a valuable asset for artists looking to add depth and realism to their digital artwork. However, there are situations where you might want to turn off pen pressure.
Understanding Pen Pressure
Before we dive into the steps, let's briefly discuss what pen pressure is and why you might want to turn it off in Clip Studio Paint.
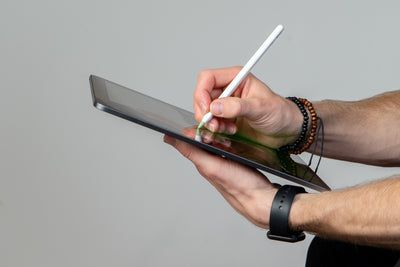
Pen pressure refers to the sensitivity of your drawing tablet or stylus when making strokes in digital art software. Essentially, it determines how thick or thin a line you can create based on the pressure you apply to your stylus. Light pressure results in a thinner line, while heavy pressure results in a thicker line.
Pen pressure can be a fantastic tool for creating natural-looking artwork, especially when it comes to simulating traditional drawing and painting techniques. However, there are times when you might need to turn it off.

Here are some reasons you might want to disable pen pressure:
- Uniform Lines: If you want consistent line thickness throughout your artwork, turning off pen pressure can be useful. This is common in technical drawings, comics, and certain styles of illustration.
- Ergonomics: Occasionally, an artist may experience discomfort or strain when working with pen pressure. In such cases, disabling it can help alleviate these issues.
- Specific Effects: Some artistic effects or techniques require precise control over line thickness, which is easier to achieve with pen pressure turned off.
-
Software Compatibility: In some rare cases, when using third-party tools, you may need to disable pen pressure to ensure the correct functioning of certain brushes or effects.

Now that we understand the context, let's explore how to turn off pen pressure in Clip Studio Paint.
Steps to Disable Pen Pressure in Clip Studio Paint
Clip Studio Paint provides a straightforward method for enabling or disabling pen pressure, and it can be done in just a few steps.
Here's how to do it:
-
Open Your File:
Start by opening the artwork you want to work on. If you're just practicing, you can create a new canvas or open a blank document.
-
Select the Brush Tool:
Click on the brush tool in the toolbar. This will bring up the brush settings and options on the left side of your screen.
-
Access Sub Tool Settings:
Within the brush settings, you'll see an option for "Sub Tool Detail" below the brush preview. Click on it.
-
Disable Pen Pressure:
In the sub tool detail settings, you will find a section labeled "Size" or "Thickness." This is where you control the pen pressure for the selected brush. To disable pen pressure, uncheck the "Pen Pressure" option. This will ensure that your brush strokes remain the same thickness regardless of the pressure applied to the stylus.
-
Test Your Brush:
After disabling pen pressure, make a few brush strokes to ensure that the line thickness remains consistent, regardless of your stylus's pressure.
-
Save Your Brush Preset:
If you intend to use this brush setting frequently, you can save it as a new brush preset. Click the "Save" button within the brush settings, and give your preset a name.
By following these steps, you can easily turn off pen pressure for any brush in Clip Studio Paint. Remember that this setting is applied on a per-brush basis, so you can have some brushes with pen pressure enabled and others with it disabled, depending on your needs.
Common Issues and Solutions
While turning off pen pressure is a straightforward process, some users encounter issues. Here are some common problems and their solutions:
1. The "Pen Pressure" Option Is Grayed Out:
If the "Pen Pressure" option is grayed out in the brush settings, it means that the brush you're using does not support pen pressure changes. In this case, try selecting a different brush or create a new one that allows pen pressure adjustments.
2. Unintended Pen Pressure:
Sometimes, even after turning off pen pressure, you might notice that it's still affecting your brush strokes. Ensure that you've disabled pen pressure for both size and opacity settings, as some brushes use pen pressure for different aspects.
3. Using a Graphics Tablet:
If you're using a graphics tablet or a stylus that supports pen pressure, you'll need to adjust the settings on your tablet itself to completely disable pen pressure. Refer to your tablet's user manual for instructions.
Conclusion
Understanding how to turn off pen pressure in Clip Studio Paint is a valuable skill for artists using the software. Whether you need uniform lines for technical drawings, want to alleviate discomfort, or have specific artistic requirements, this guide has shown you how to achieve it.
Remember that pen pressure settings are brush-specific, so you can always switch between brushes with and without pen pressure enabled to suit your artwork. With practice, you'll become proficient in customizing your brushes to achieve the desired effects for your digital art.


Leave a comment