We're insanely grateful that you got PenPad, thank you very much for your support in helping us bringing a feeling and experience to digital art on the iPad. This welcome page it to help you get setup if our instructions didn't already help get you there. Let's get straight to it.
Getting started
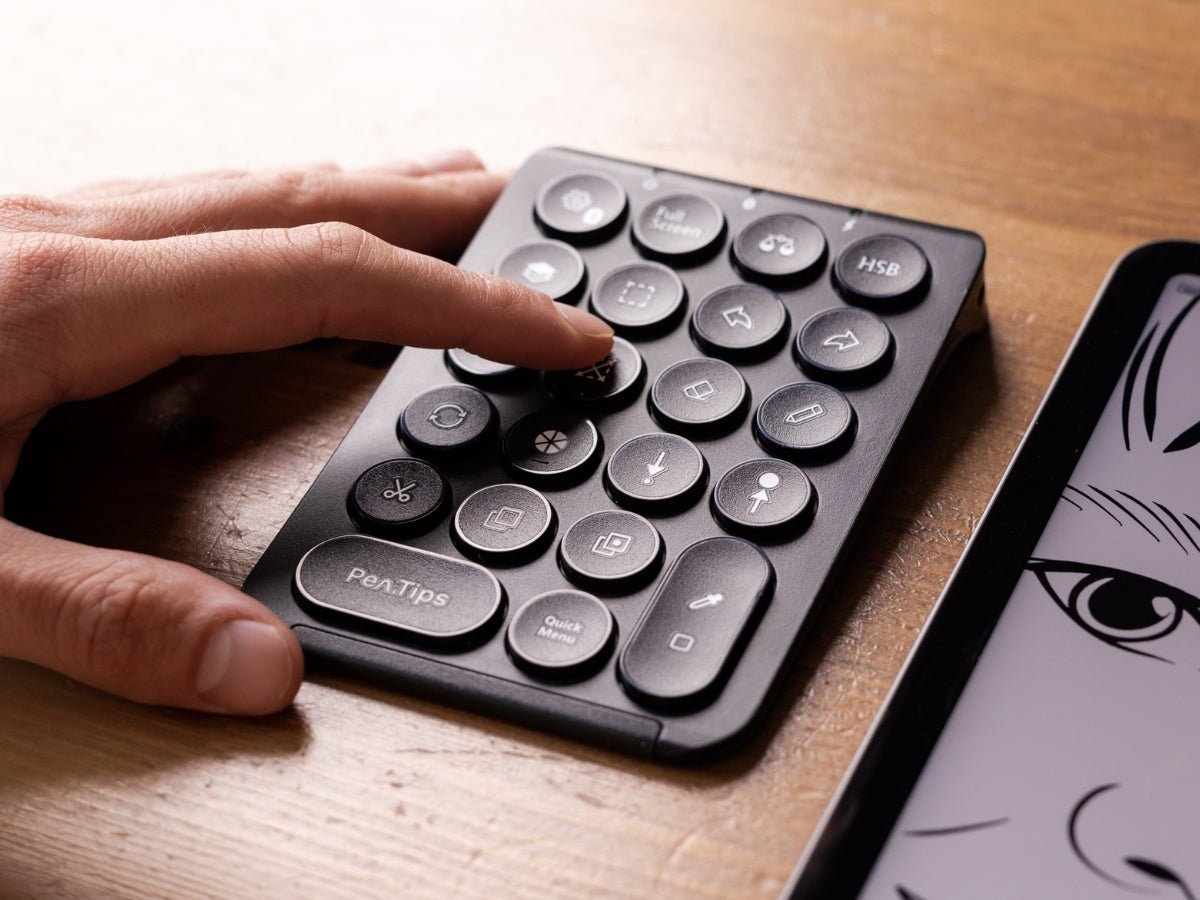
On the back of the device, you'll find an "on/off" switch. Switch it to on. Go to to your bluetooth settings and tap PenPad. Don't see it there? Press and hold the "Pen.Tips + Settings" button on PenPad to put PenPad into pairing mode again. We deliver PenPad's pre-charged, but it could be that the charge has depleted during shipment. If PenPad does not show any light indication, you made need to charge your device for 30 minutes before use. Otherwise, you can head straight to Procreate.
Functions
We've stored over 20 functions for you on PenPad, and even some Easter eggs. If you'd like to increase or decrease your brush size by 1%, then press and hold "Pen.Tips + decrease/increase brush size". However, this may not work yet with every device, this is a known bug in Procreate's software that we're working together on to resolve.
Looking for the smudge tool? Press the "Actions Popover" button, tap "Prefs" before heading into "Gesture Controls". Where it says "Smudge" you can opt for different options as to how your iPad will respond to smudge. The square you see there, can be found under the Eyedropper button on PenPad. Now its up to you to decide what works best in your workflow!

Light indicators
There are 3 indicators on the top of your device. From left to right, you'll see the power on/off light, Bluetooth light and charging light. When you turn the device on, the first light will turn green. Depending on if your device has previously been paired, then the Bluetooth button will switch on momentarily. If you press and hold "Pen.Tips + settings" for 5 seconds, the Bluetooth light will start blinking. This indicates that it is in pairing mode. The last light, indicates the charge of a device. When you plug it in, the light will turn red When it is fully charged, the light will turn off again. If you leave it PenPad charging too long, the light will start blinking.
How do I charge PenPad?
In the box, you'll find a micro-USB or USB-C cable (depending on your version). A maximum of 20-watt charger is advised.
Common challenges and solutions
Our PenPad will only work under the American English input method on iPad. On the bottom left of your keyboard on iPad, you can see a globe button. Hold this button before switching it to English (US). If you can't find the English input method, then this is how you add it. Please go to your Settings, tap General, and click Keyboards. There you can "Add New Keyboard". Browse through the list before selecting "English (US)". Now you will be able to tap the globe button before selecting English (US).
If they Eyedropper key is not working in your Procreate app, please press the "Actions Popover" button, tap "Prefs" before heading into "Gesture Controls". Tap "Eyedropper" in the bar on the left, before selecting "SQUARE + Apple Pencil".
If you need to activate your onscreen keyboard, please go to a field where you can type. In the bottom right of your iPad, you will see a small microphone and two letters. If you tap on those letters, a popover will present you with the option to "Show Keyboard". Tap this and your keyboard will appear.
Still experiencing issues?
If you have any questions or remarks, please email us at write@pen.tips.


Leave a comment
This site is protected by hCaptcha and the hCaptcha Privacy Policy and Terms of Service apply.